1
Accessing the Grading Interface
To begin, navigate to the main page. Once there, enter your Judge ID given by the organizers and click "Start Grading".
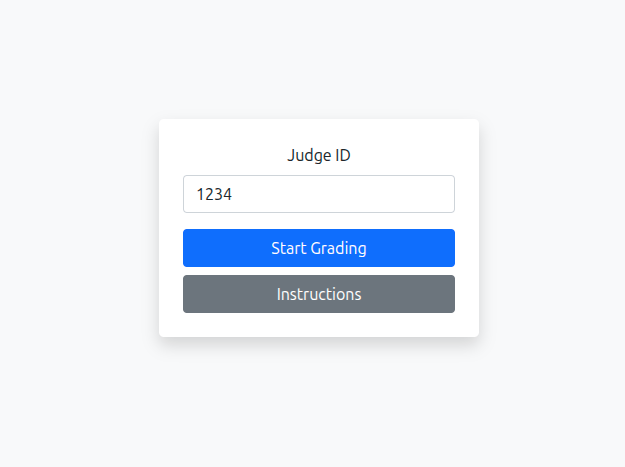 Fig 1: Main dashboard with "Start Grading".
A step-by-step guide to effectively grade LLM generated proofs.
To begin, navigate to the main page. Once there, enter your Judge ID given by the organizers and click "Start Grading".
Fig 1: Main dashboard with "Start Grading".
Once logged in, you will see a navigation bar on the left side. This shows your assigned questions. Initially, you will not have any assigned questions. To get assigned questions, click on "Browse Unallocated Problems". This will allow you to pick a question to allocate to yourself. Once you click on "Add Selected to My Batch", the question will be assigned to you and you can start grading it. If you decide to not grade the question after allocation, you can click on "Give Up Current Problem" to unassign it from yourself. Note that if you unassign a question, it will be available for other judges to allocate. If you have allocated a question, but have not graded all model attempts, this will be indicated in the navigation bar (see below).
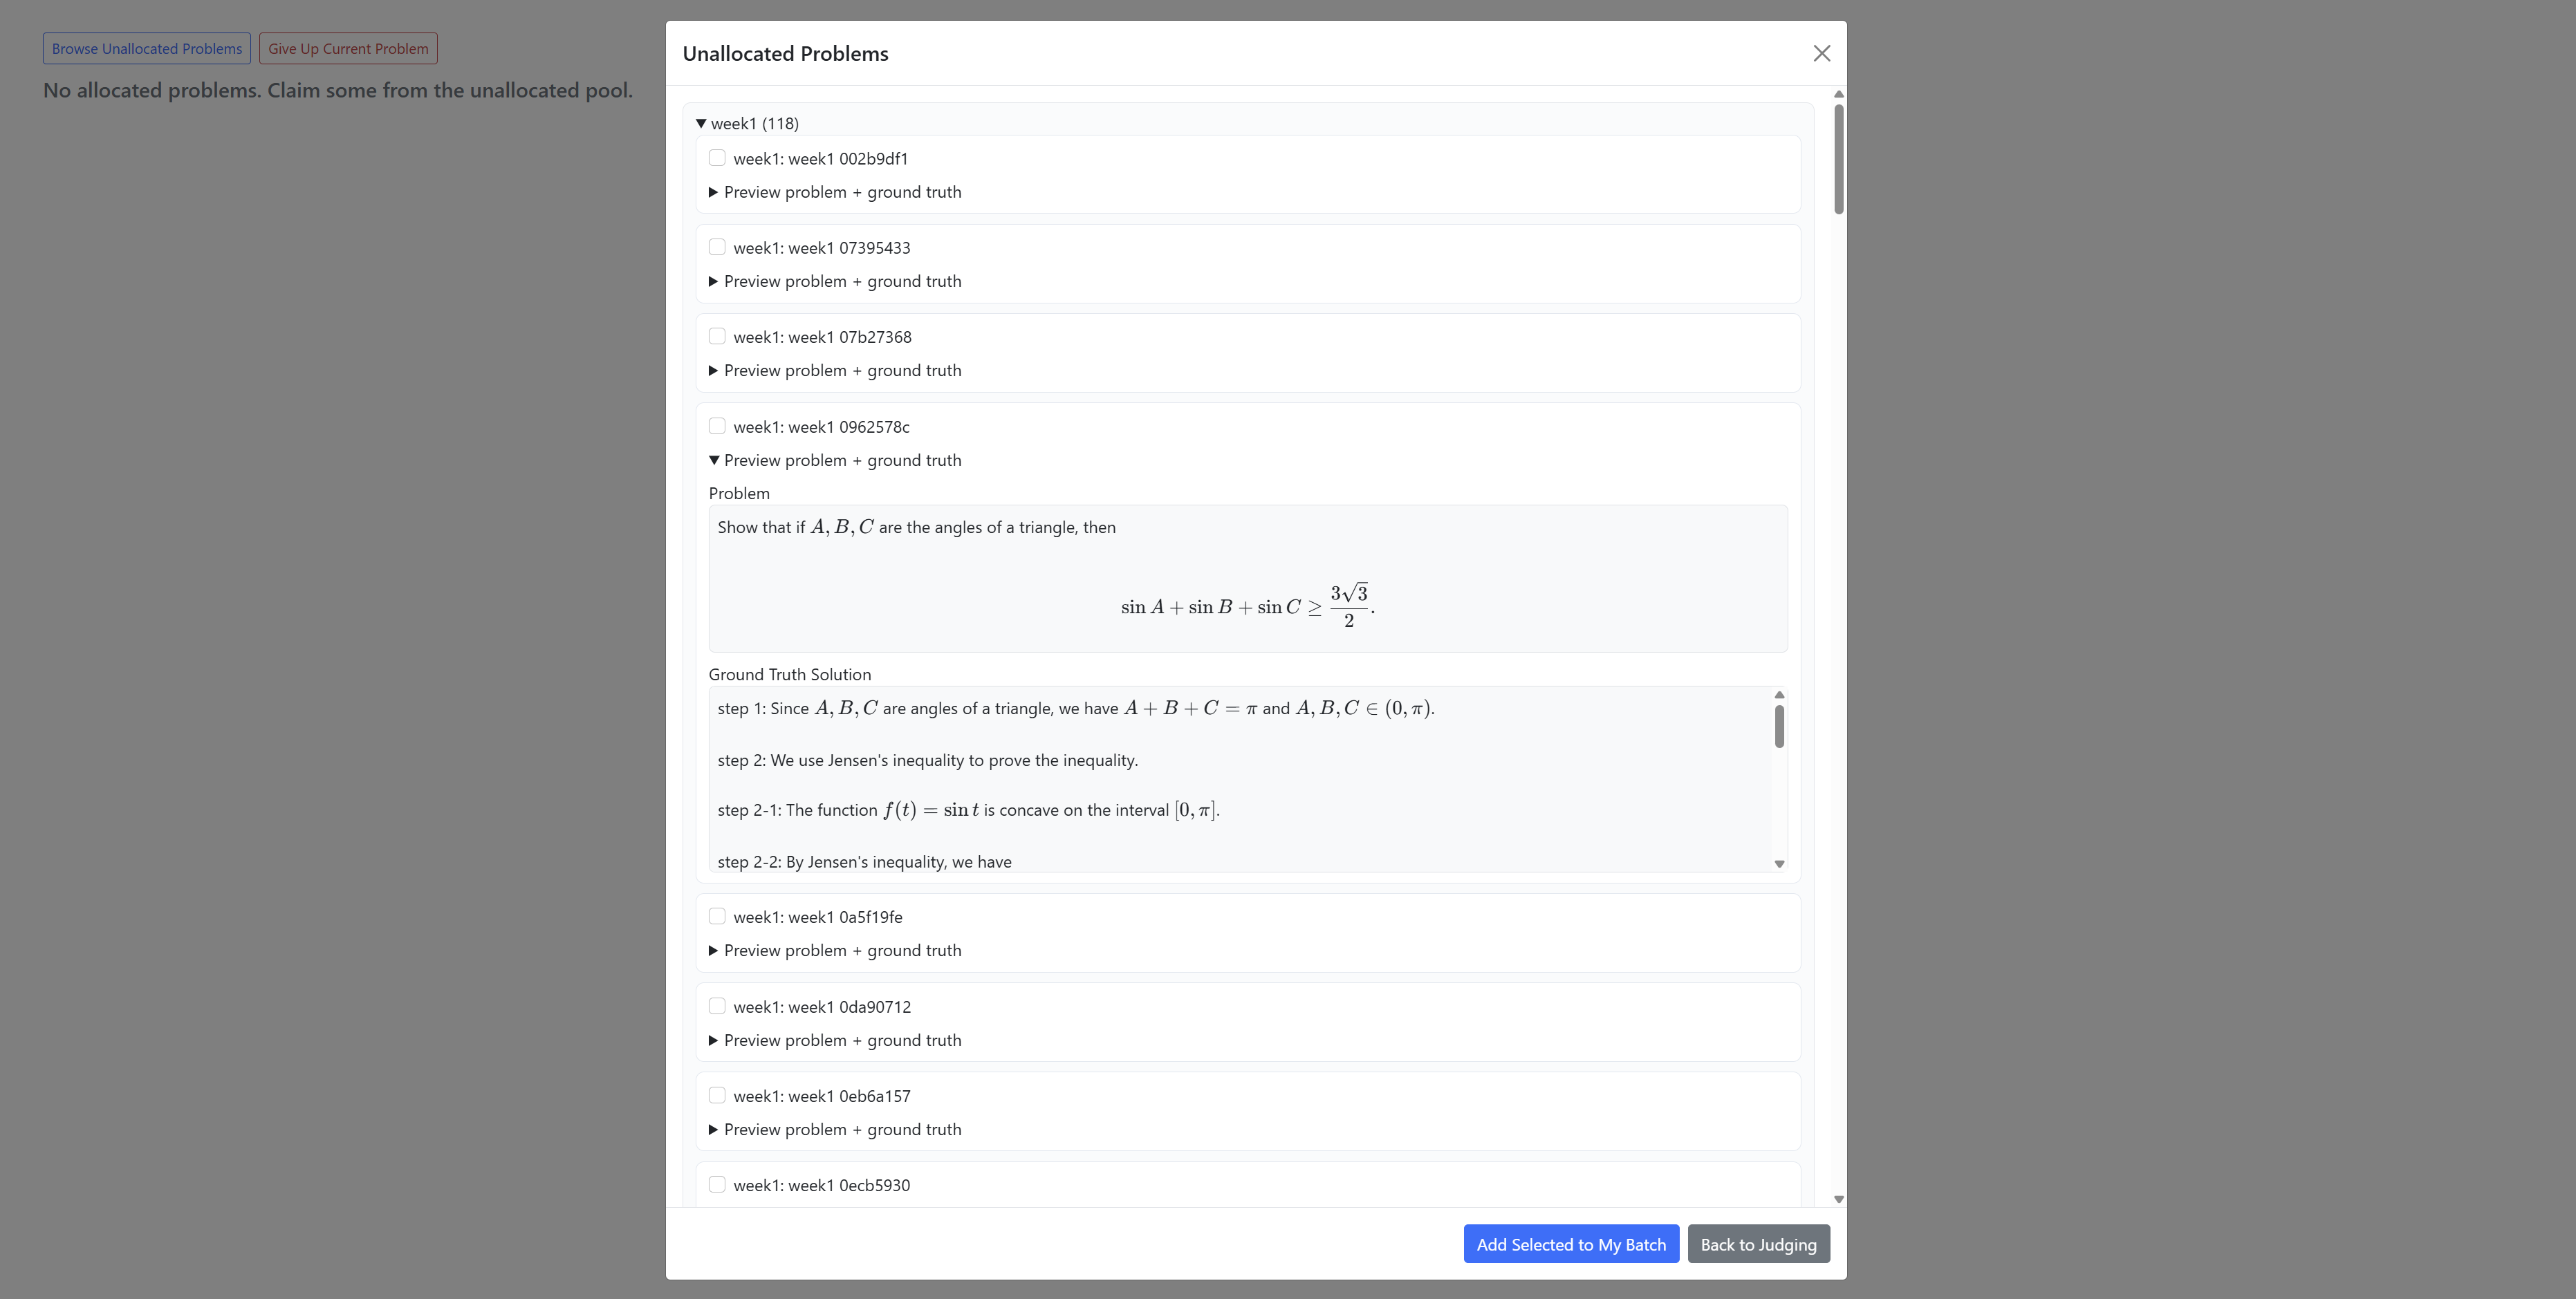 Fig 2: Problem Allocation
You will see a navigation bar on the left side. This shows your assigned questions. Clicking on any question will guide you to the problem and model attempts. Note that to see all your questions, you have to navigate the sidebar (e.g., by clicking "<- All Competitions")
The navigation bar indicates how much you progressed on each question (each of which has multiple model attempts). The color coding is as follows:
While not required, we highly recommend (and hugely prefer) that you evaluate all model attempts for a question before progressing to the next question. Feel free, however, to grade the assigned questions in any order you prefer.
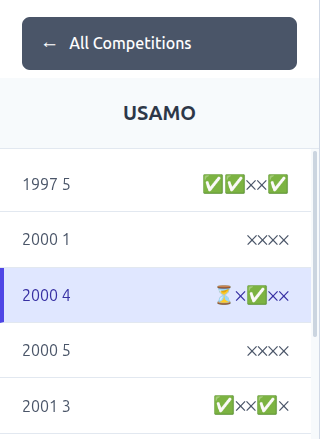 Fig 3: File Directory
At the top of the page, you will see the problem statement with some additional metadata. Read the problem carefully. If you believe the problem statement is faulty, please follow these instructions:
If you reconsider after submitting the issue, you can always uncheck the checkbox (this will automatically save the change). If another judge has submitted an issue, you will see this as a red box above the problem statement.
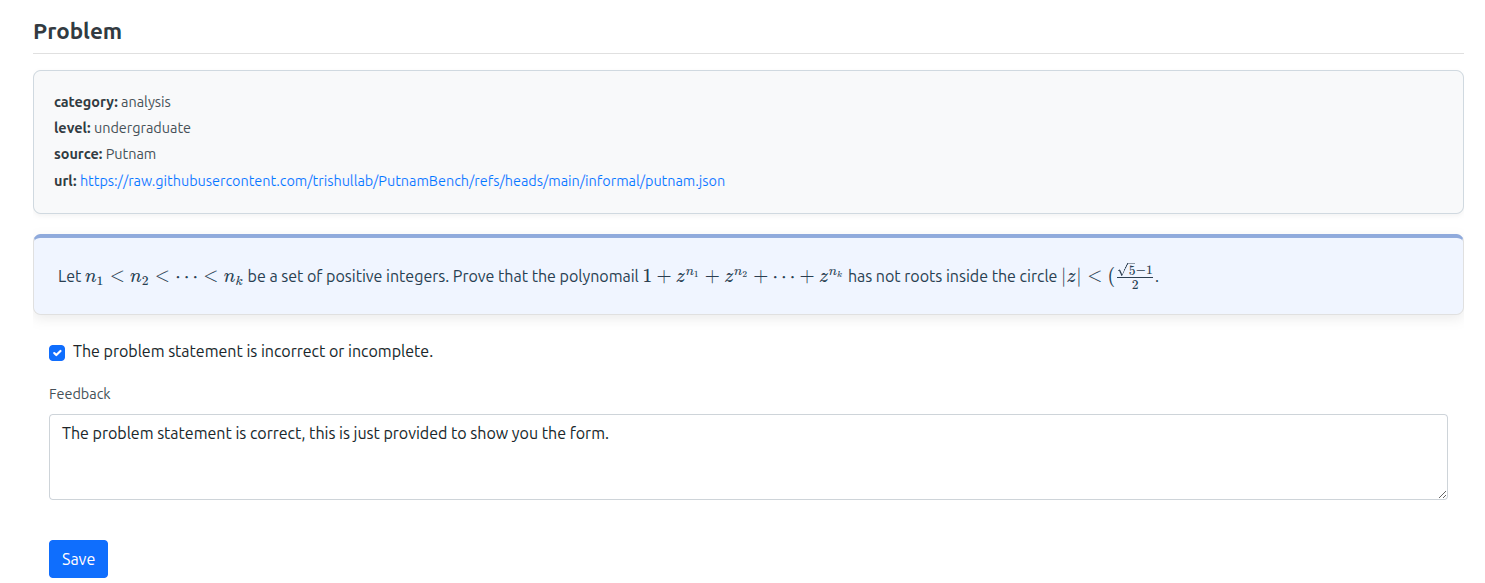 Fig 4: Problem statement interface.
For your reference, we also provide a ground-truth solution if possible. Note that these (automatically extracted) solutions can contain mistakes, so be careful with its interpretation. The solution can guide you in understanding the problem, but there are always multiple ways to prove something, all of which should be counted as correct. If you believe the ground-truth solution is faulty, you can follow the same instructions as above to indicate this. However, for ground-truth solutions, this is not required, as they are solely for your reference and it is expected that some provided solutions will contain mistakes. If another judge has submitted an issue, you will see this as a red box above the solution.
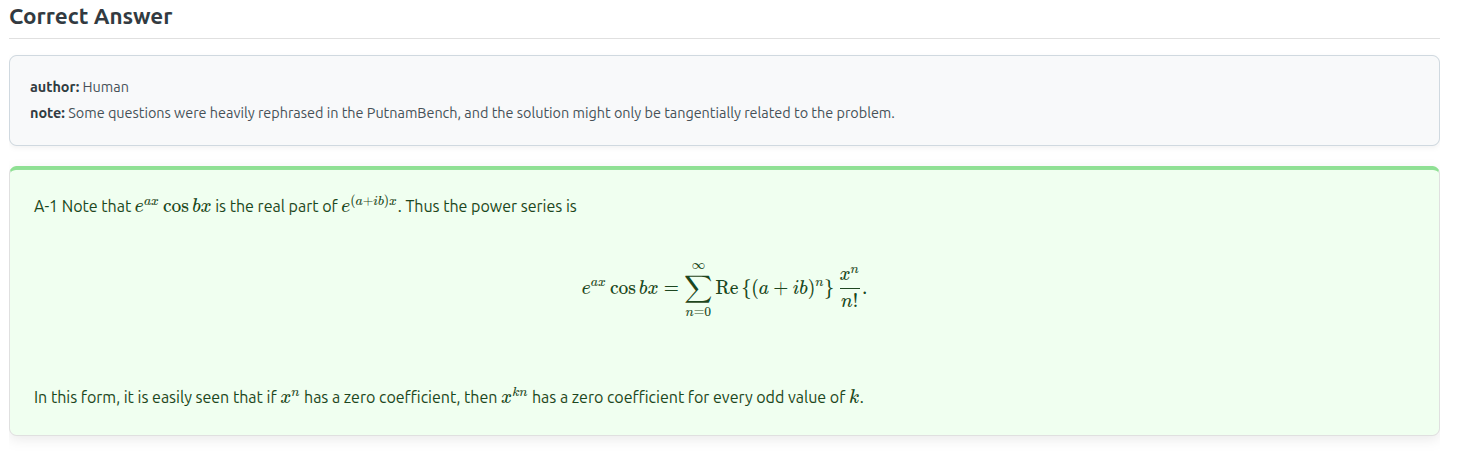 Fig 5: Ground-truth solution interface.
For each problem, you will grade multiple attempts. In this interface, you can navigate between attempts by selecting "Run 1", "Run 2", etc. At the top of each solution, you will see
There is a divider between the model attempt and ground-truth solution that allows you to make one of them larger.
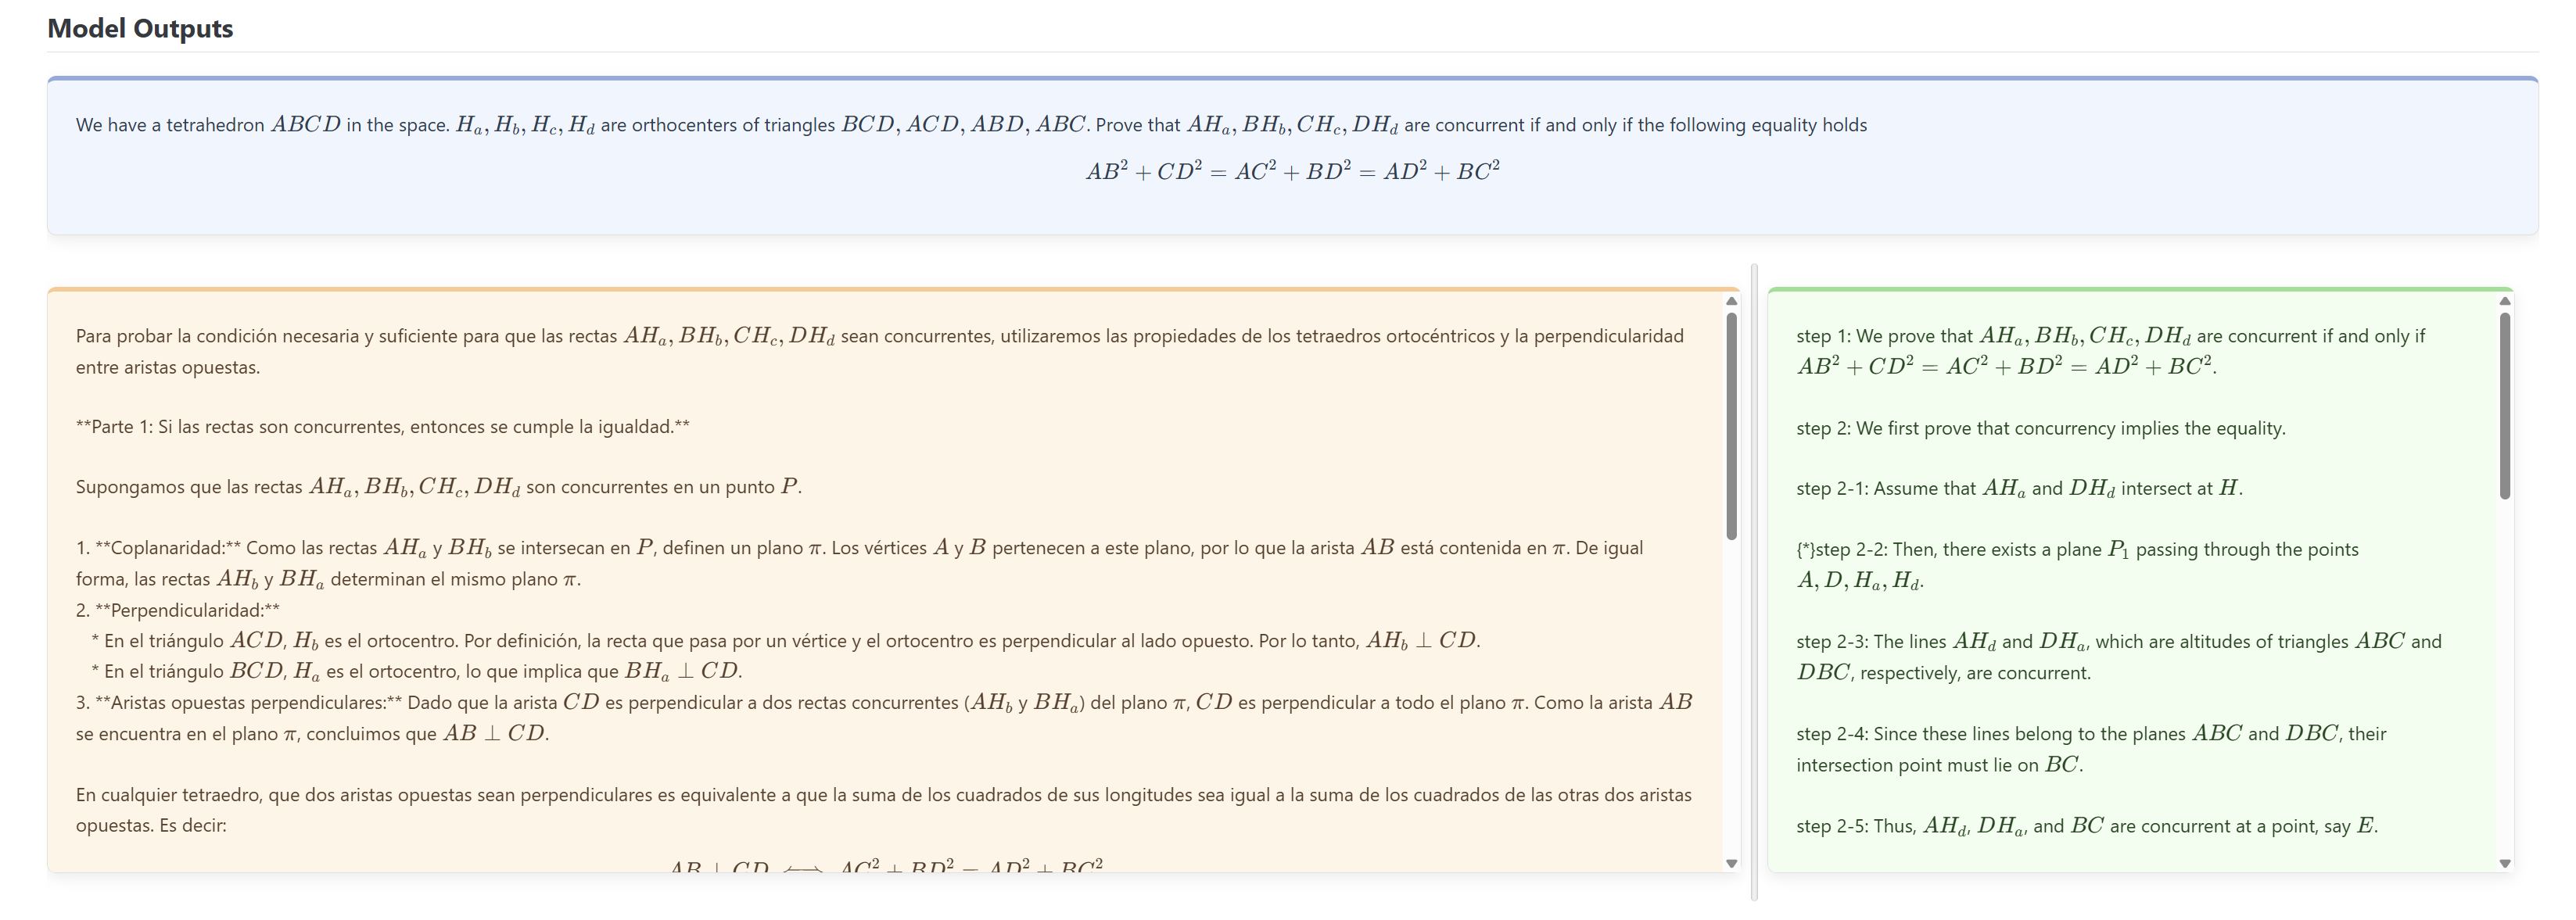 Fig 6: Model outputs interface.
A solution should be considered correct even if it would earn 5+/7 points in a full grading. Examples of small penalties worth 1 point are if the solution:
You will grade whether the model attempt is correct (scores=6/7) or incorrect (scores=0/1). Small errors in the model attempt that can be easily fixed (e.g. typos, small oversights) should be graded as correct. You are required to provide a score and feedback, describing the reasoning behind your score. You can additionally add the following:
Press "Save" after you have made your grade. This will store your grading. Since we go for as many problems as possible, only add annotations if you think they are needed or useful, and easy to create.
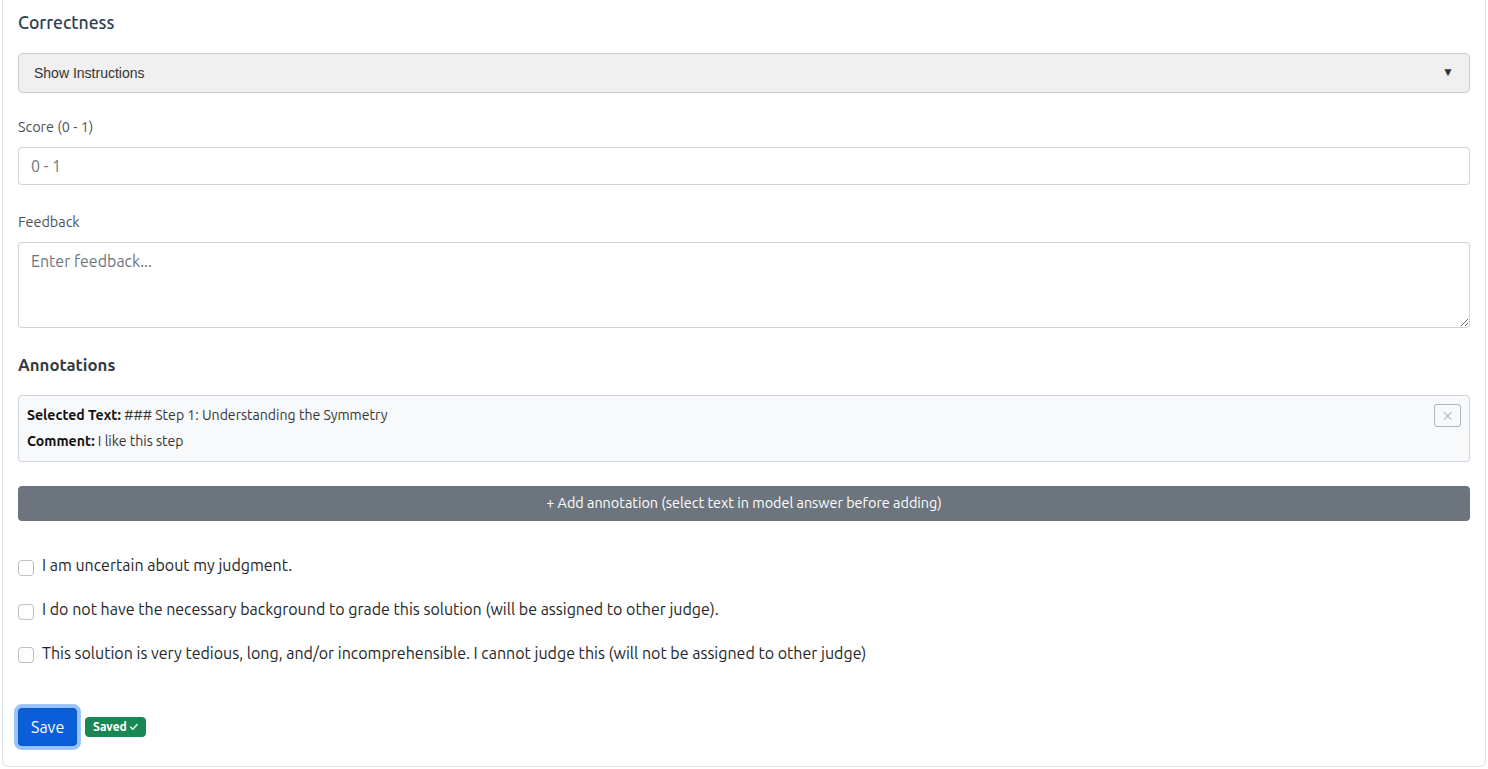 Fig 7: Form interface.